Navigating the Cornis Drone App
🎯 Learning Objectives
By the end of this chapter, you will be able to:
- Navigate through all screens of the Cornis Drone App
- Understand the workflow from login to inspection completion
- Know the purpose of the synchronization button
- Understand the two inspection phases: calibration and automatic flight
- Recognize the role of the checklist in pre-flight validation
- Identify inspection status indicators
- Why is it critical to know the orientation of the blades
⏱️ Estimated time: 8-10 minutes
Introduction
We are almost done!
The last thing we need to do is to have a look at the Cornis Drone App. This is the main software you will interact with when performing inspections.
It lets you create new flight missions, perform the inspection, and view the inspection status of you turbines.
The screens
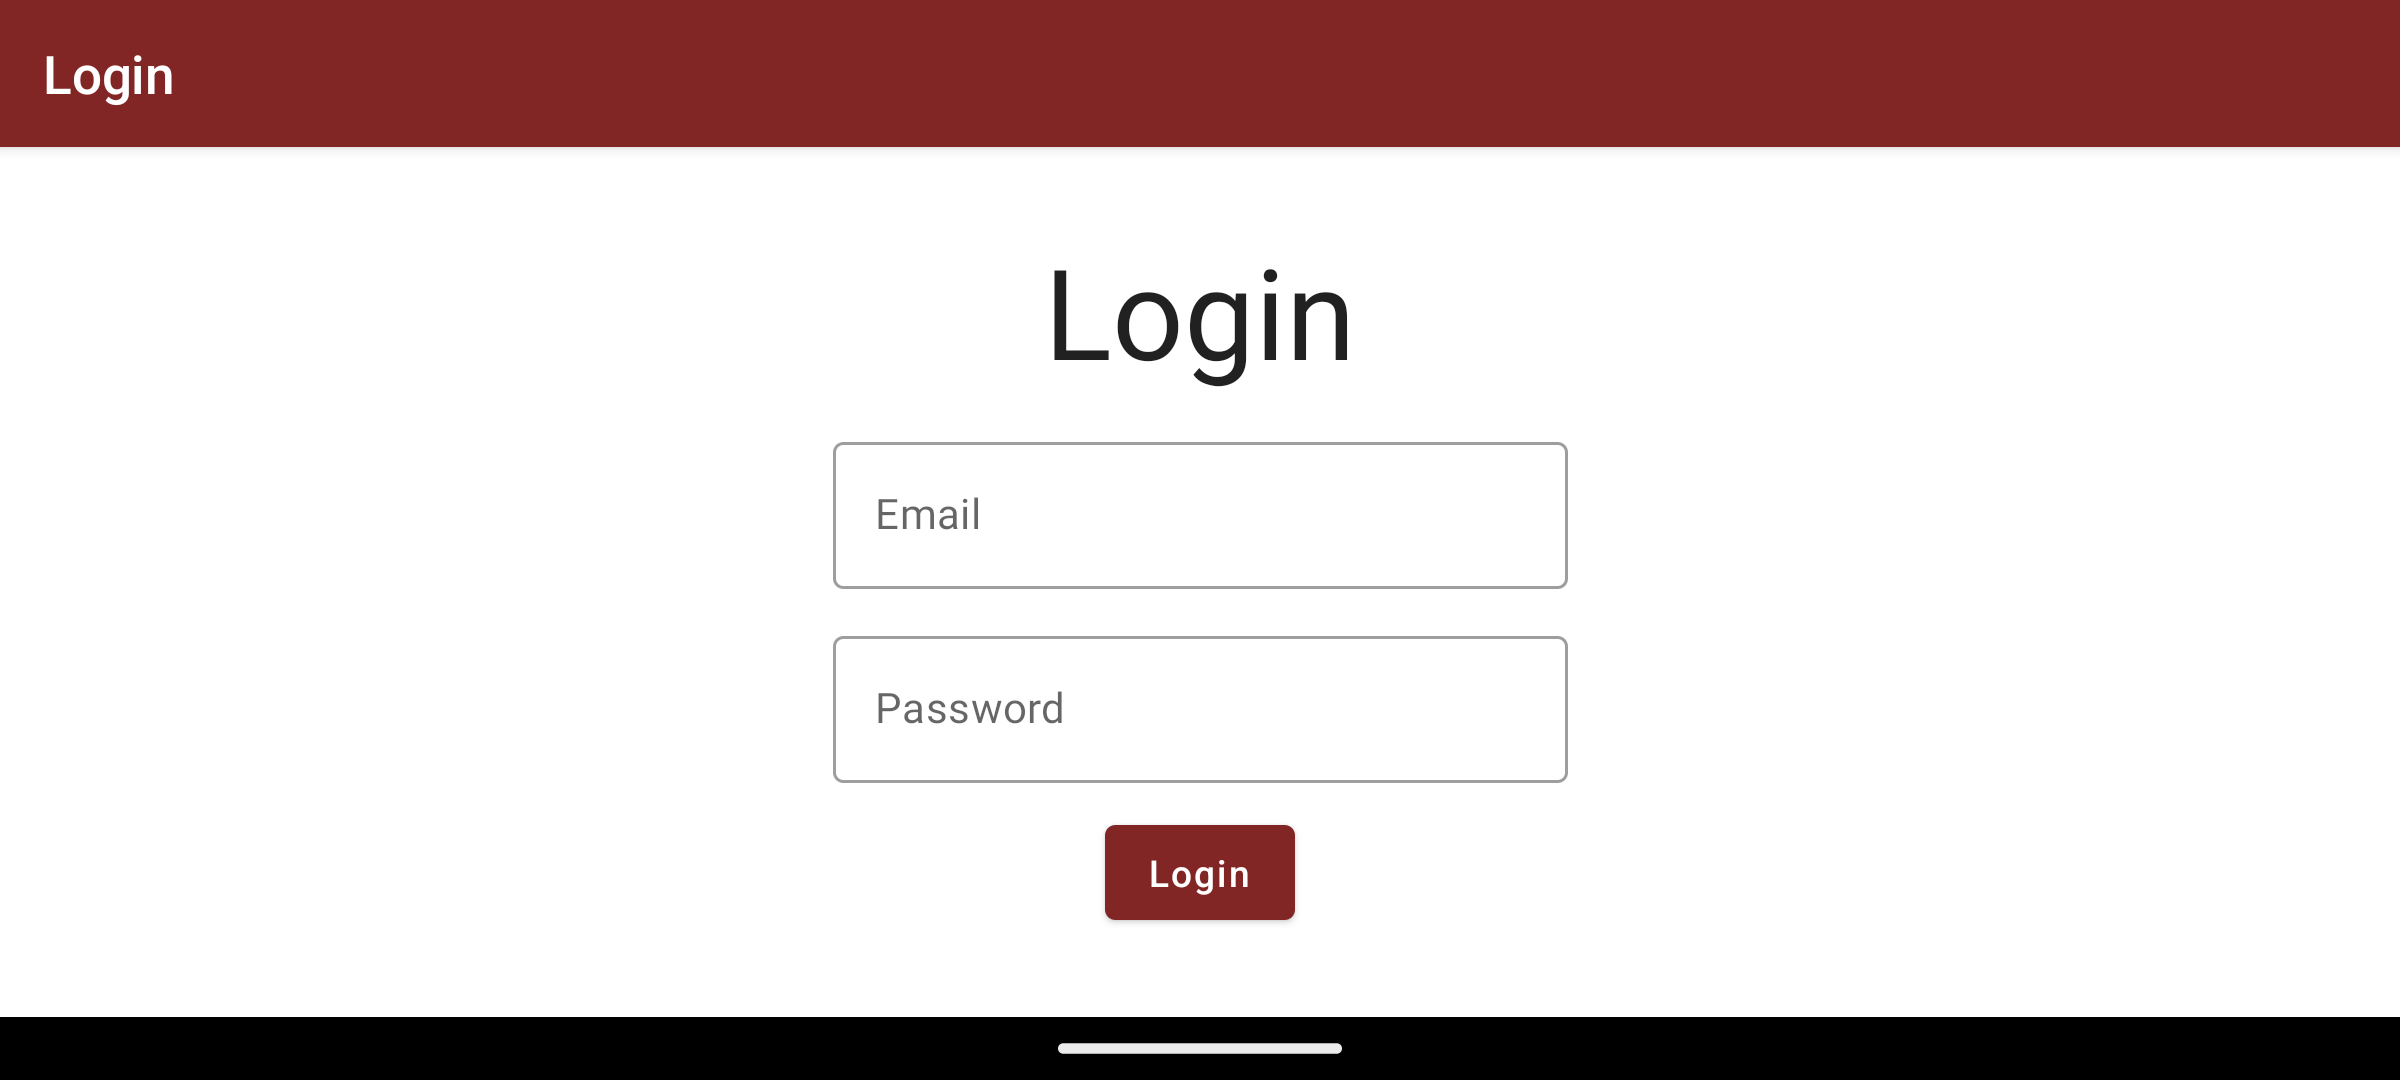
Login page
Use you Cornis logins (the same as for https://inspection.cornis.fr/) to log into your account. Make sure your account was created with the proper rights to access the pilot space. In case of doubt, refer to your Cornis contact.
📝 Note
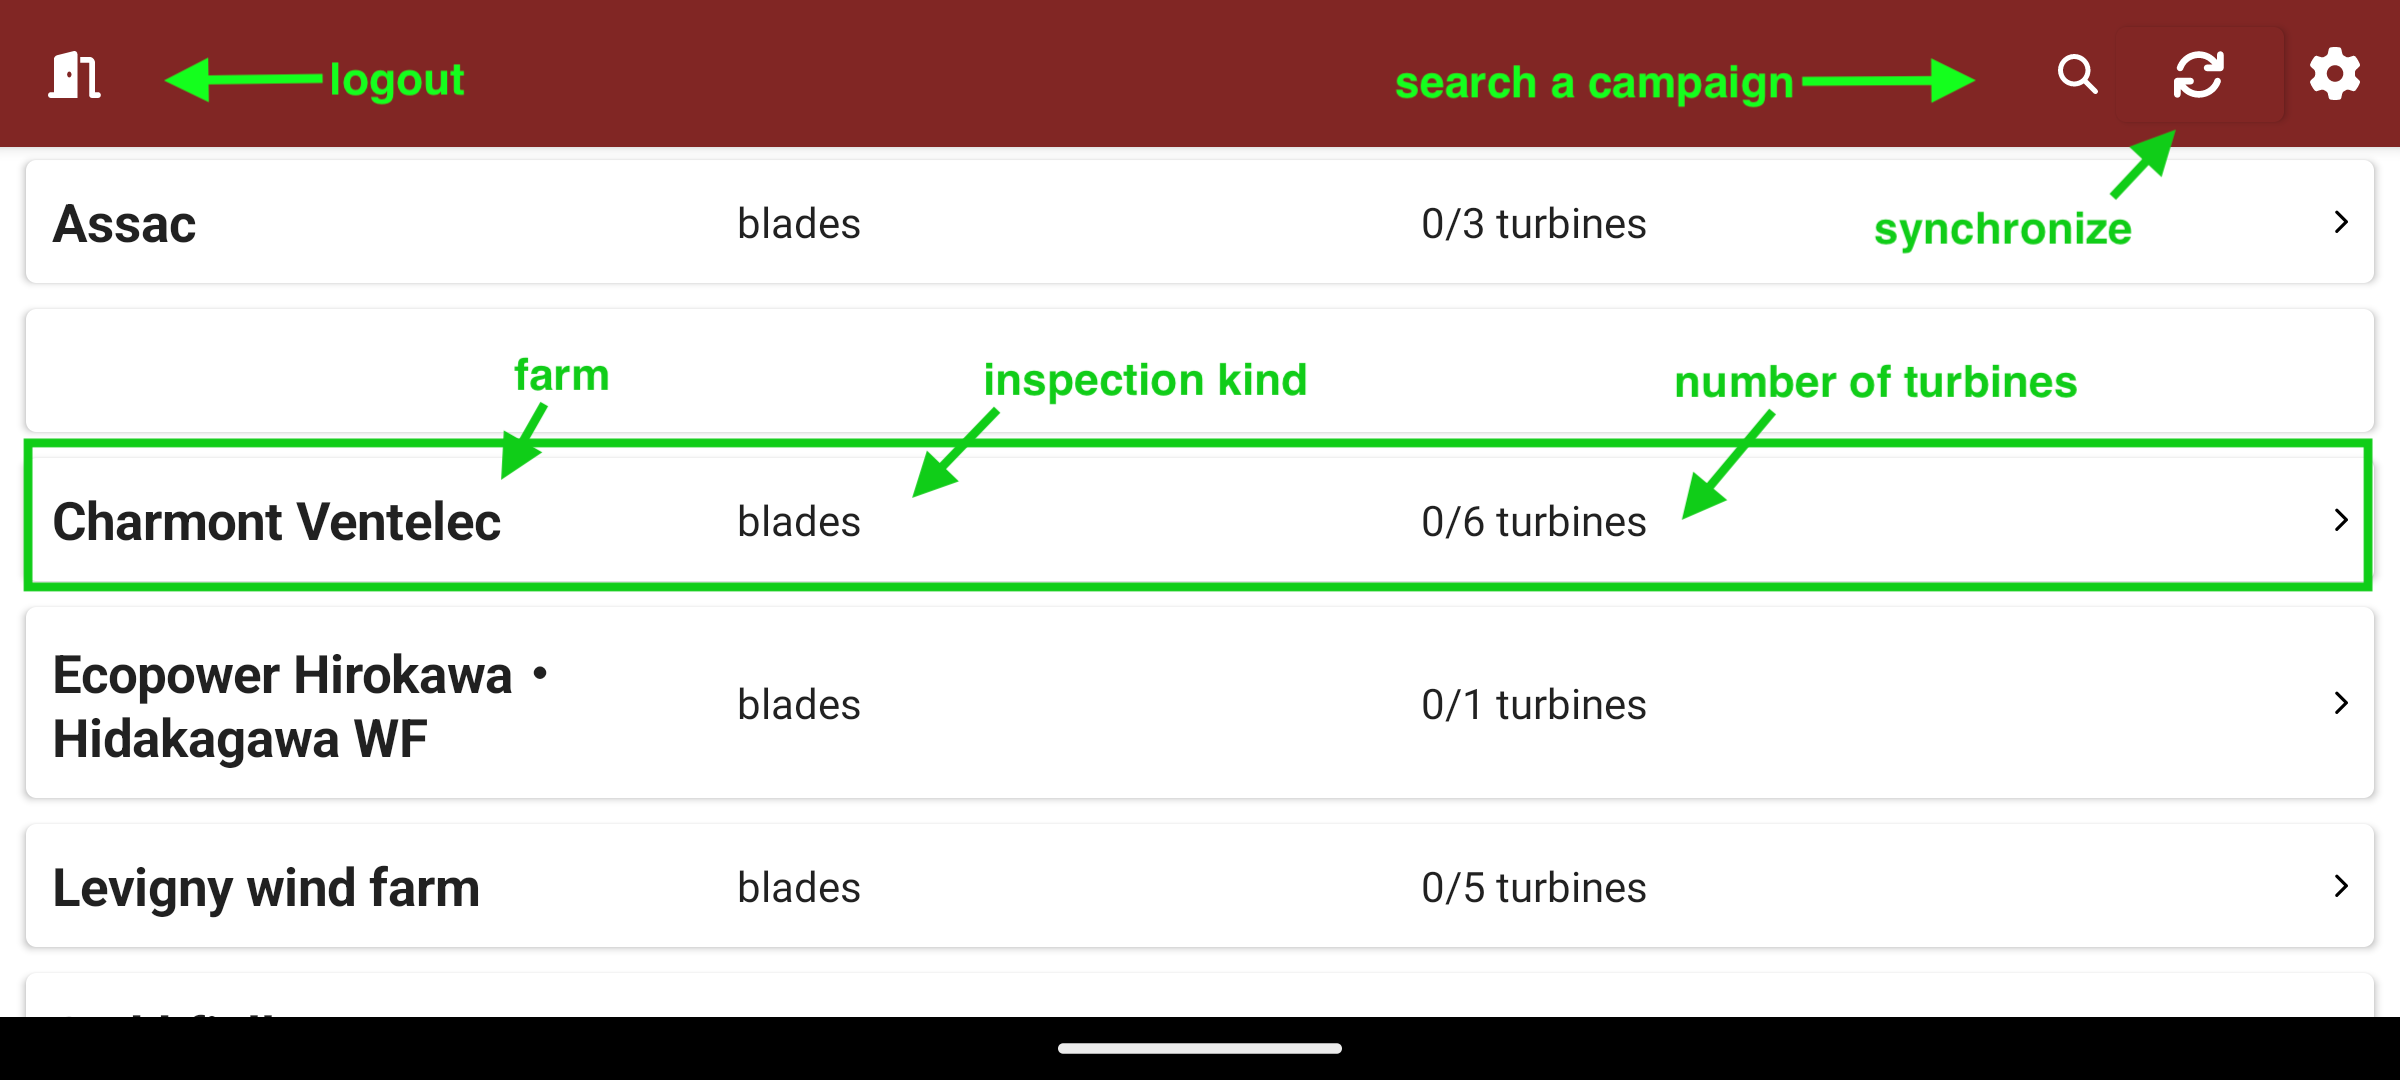
Inspection campaigns
This screen lists your inspection campaigns. Make sure to have the proper inspection campaign for the farm you want to inspect, or click the “synchronize” button to download your latest campaigns. This button is also used to send the data of the inspections you have performed.
💡 Pro Tip
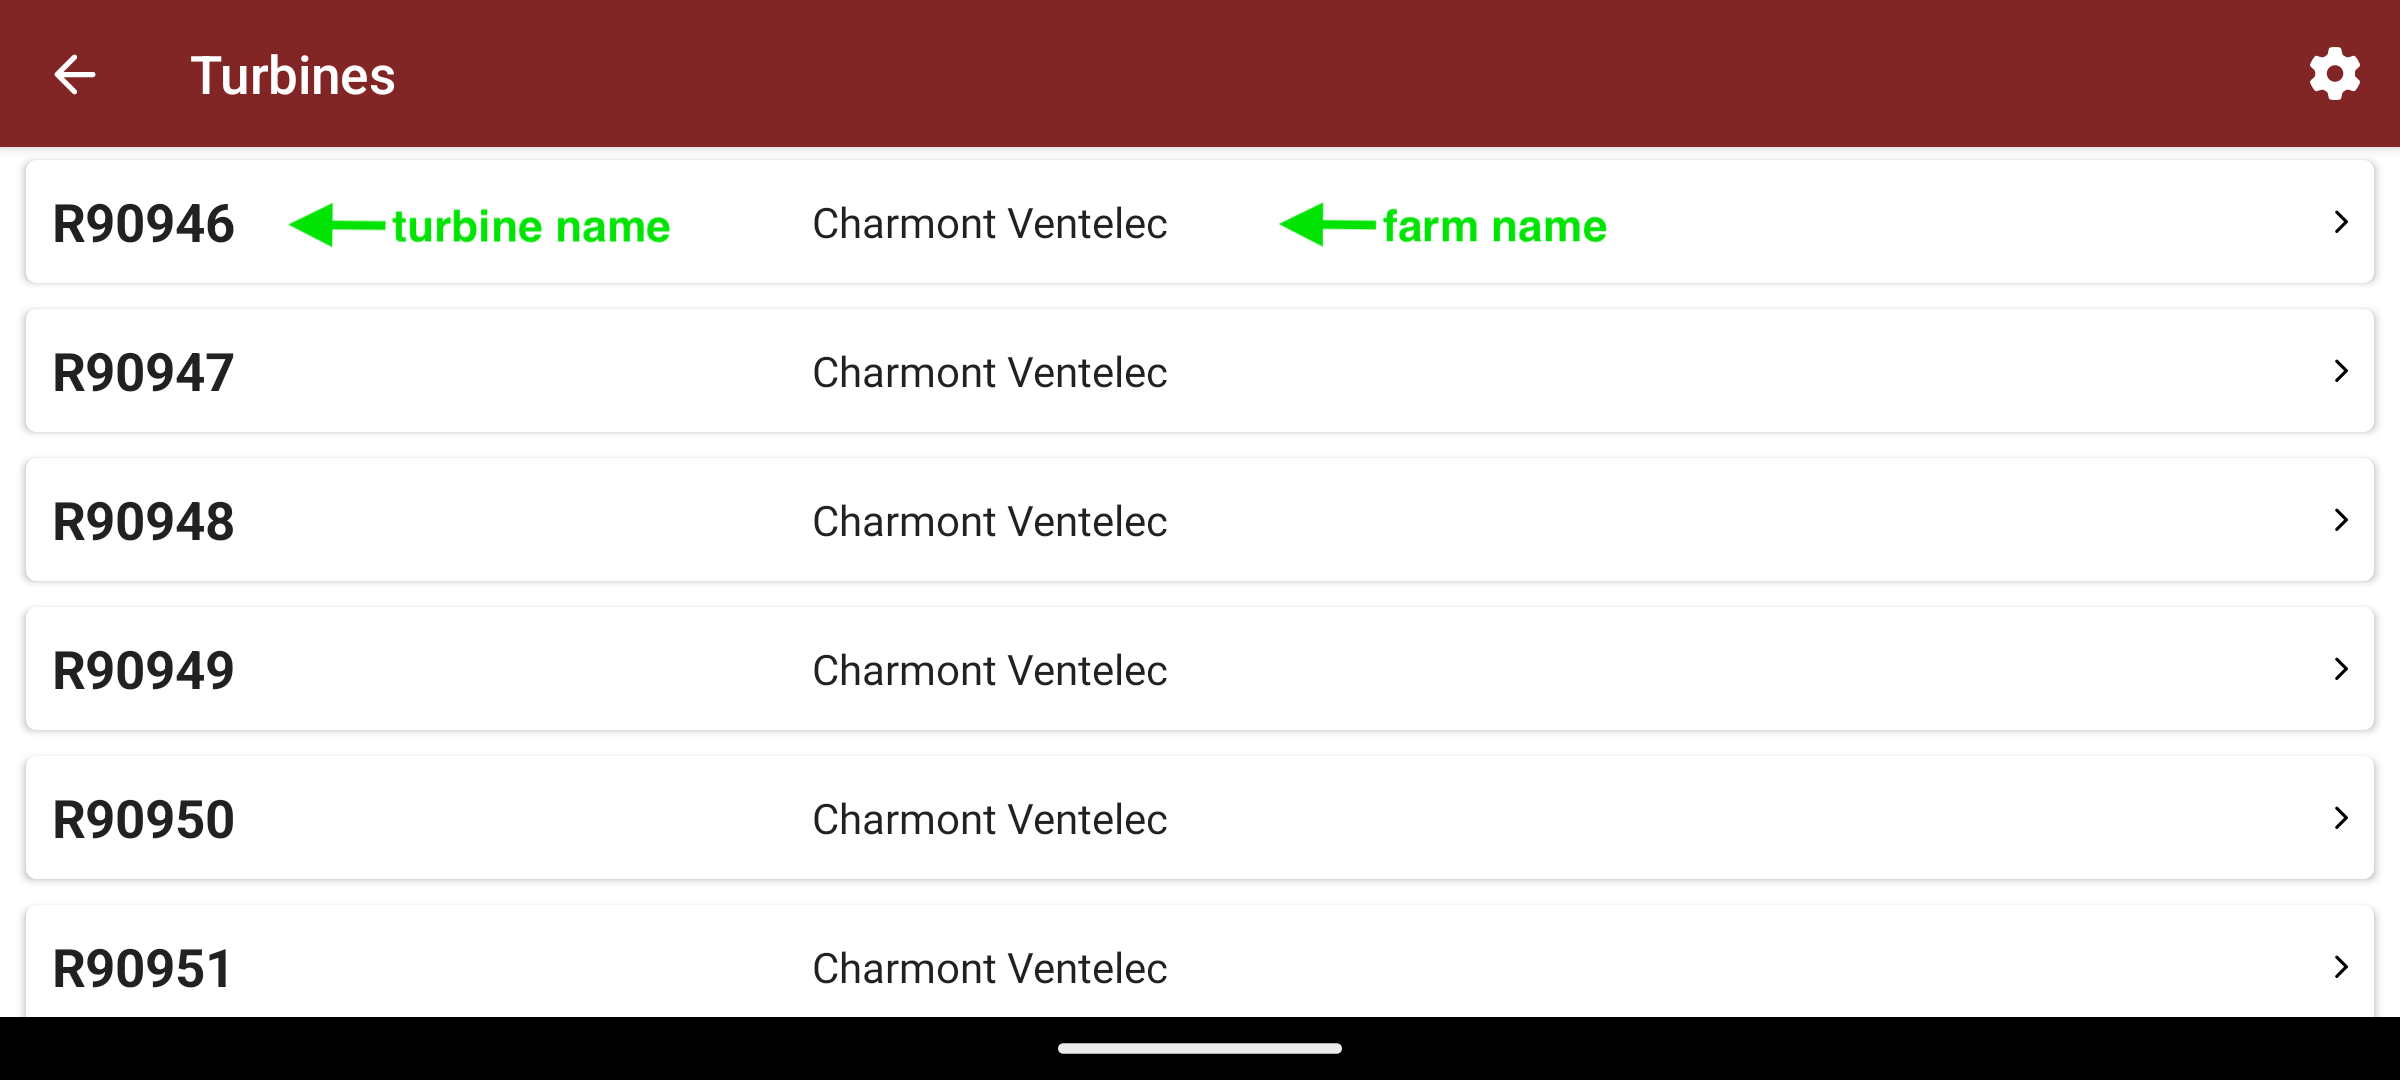
Turbines
Here you can see the turbines in the farm, and their inspection status. A checkmark will mean that the turbine was done, an hourglass that it was started but not finished yet.
📈 Status Indicators
Missions
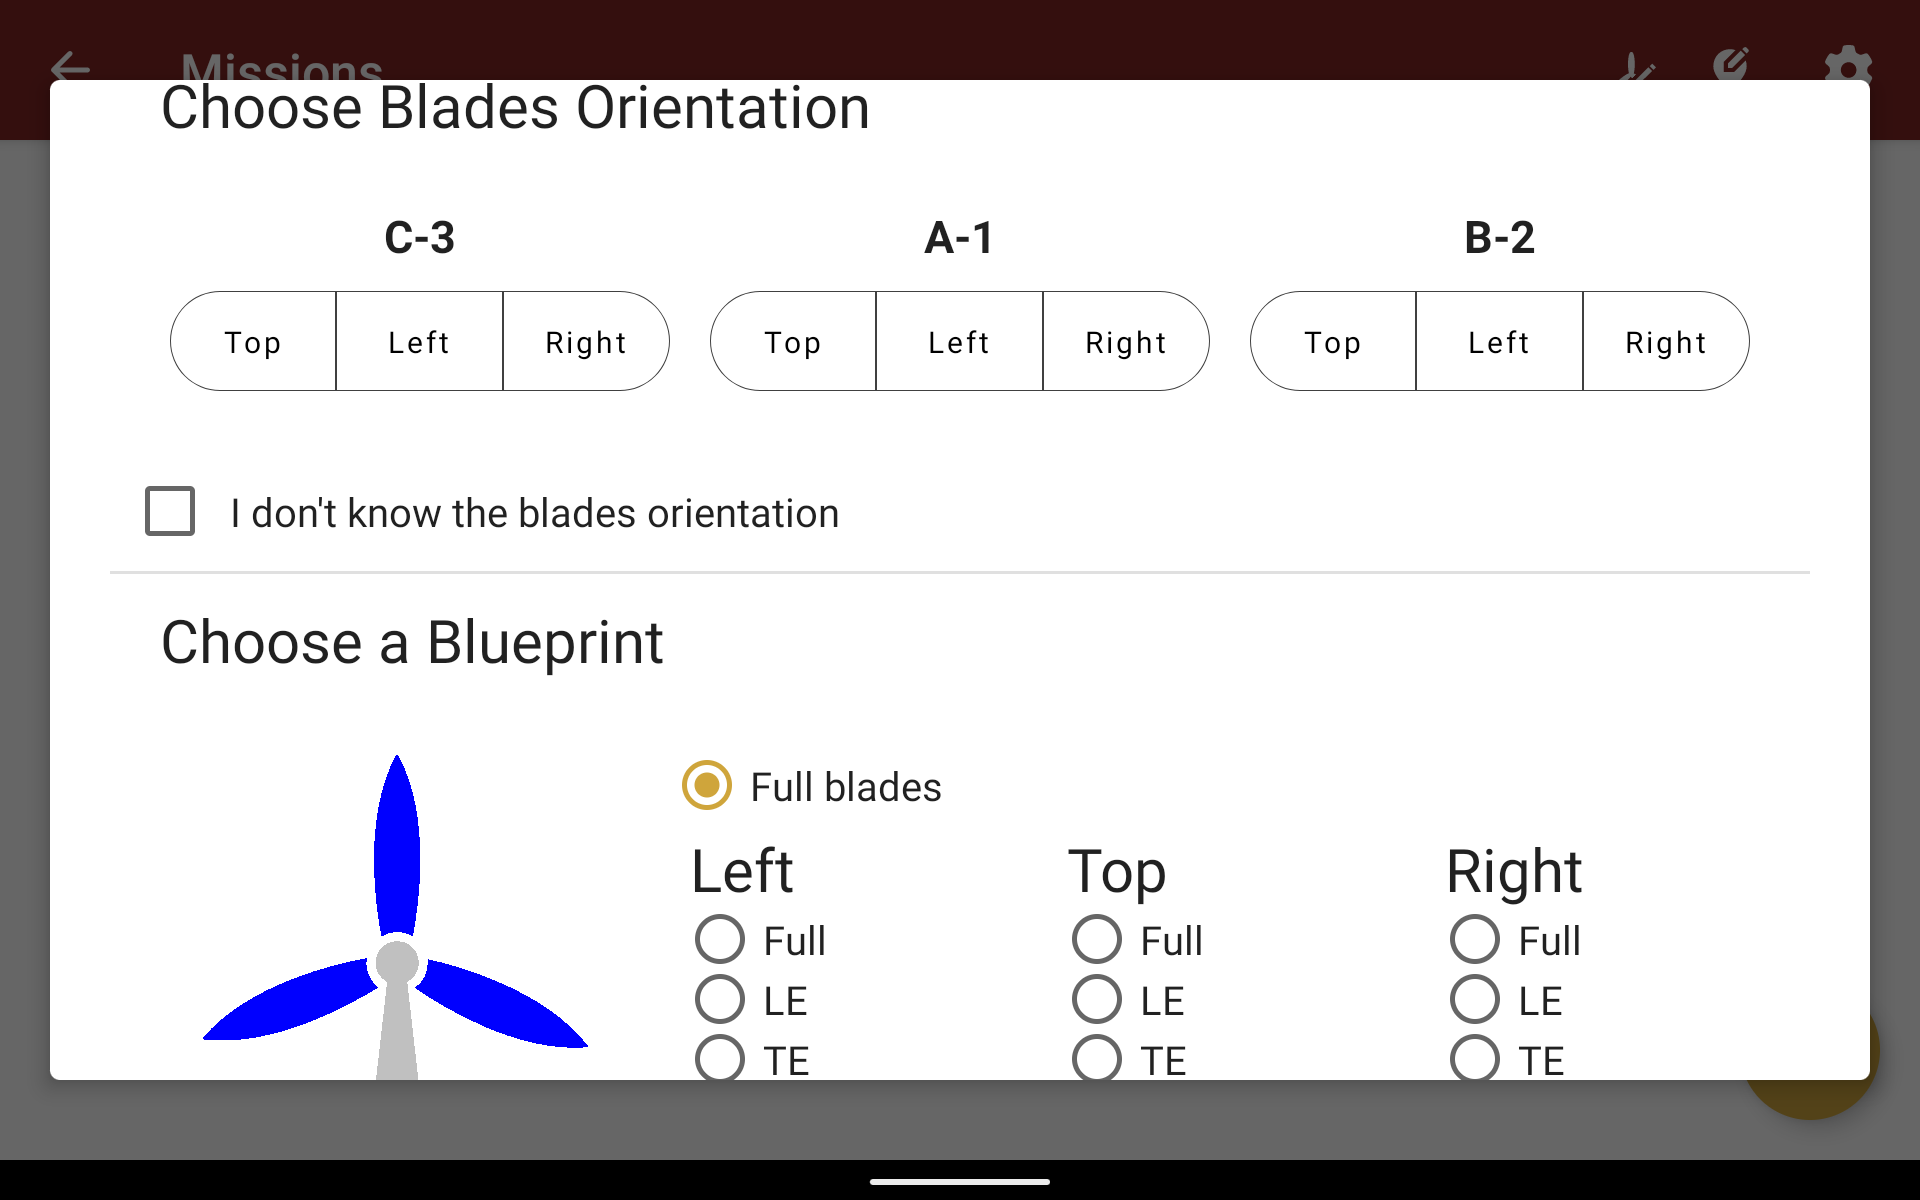
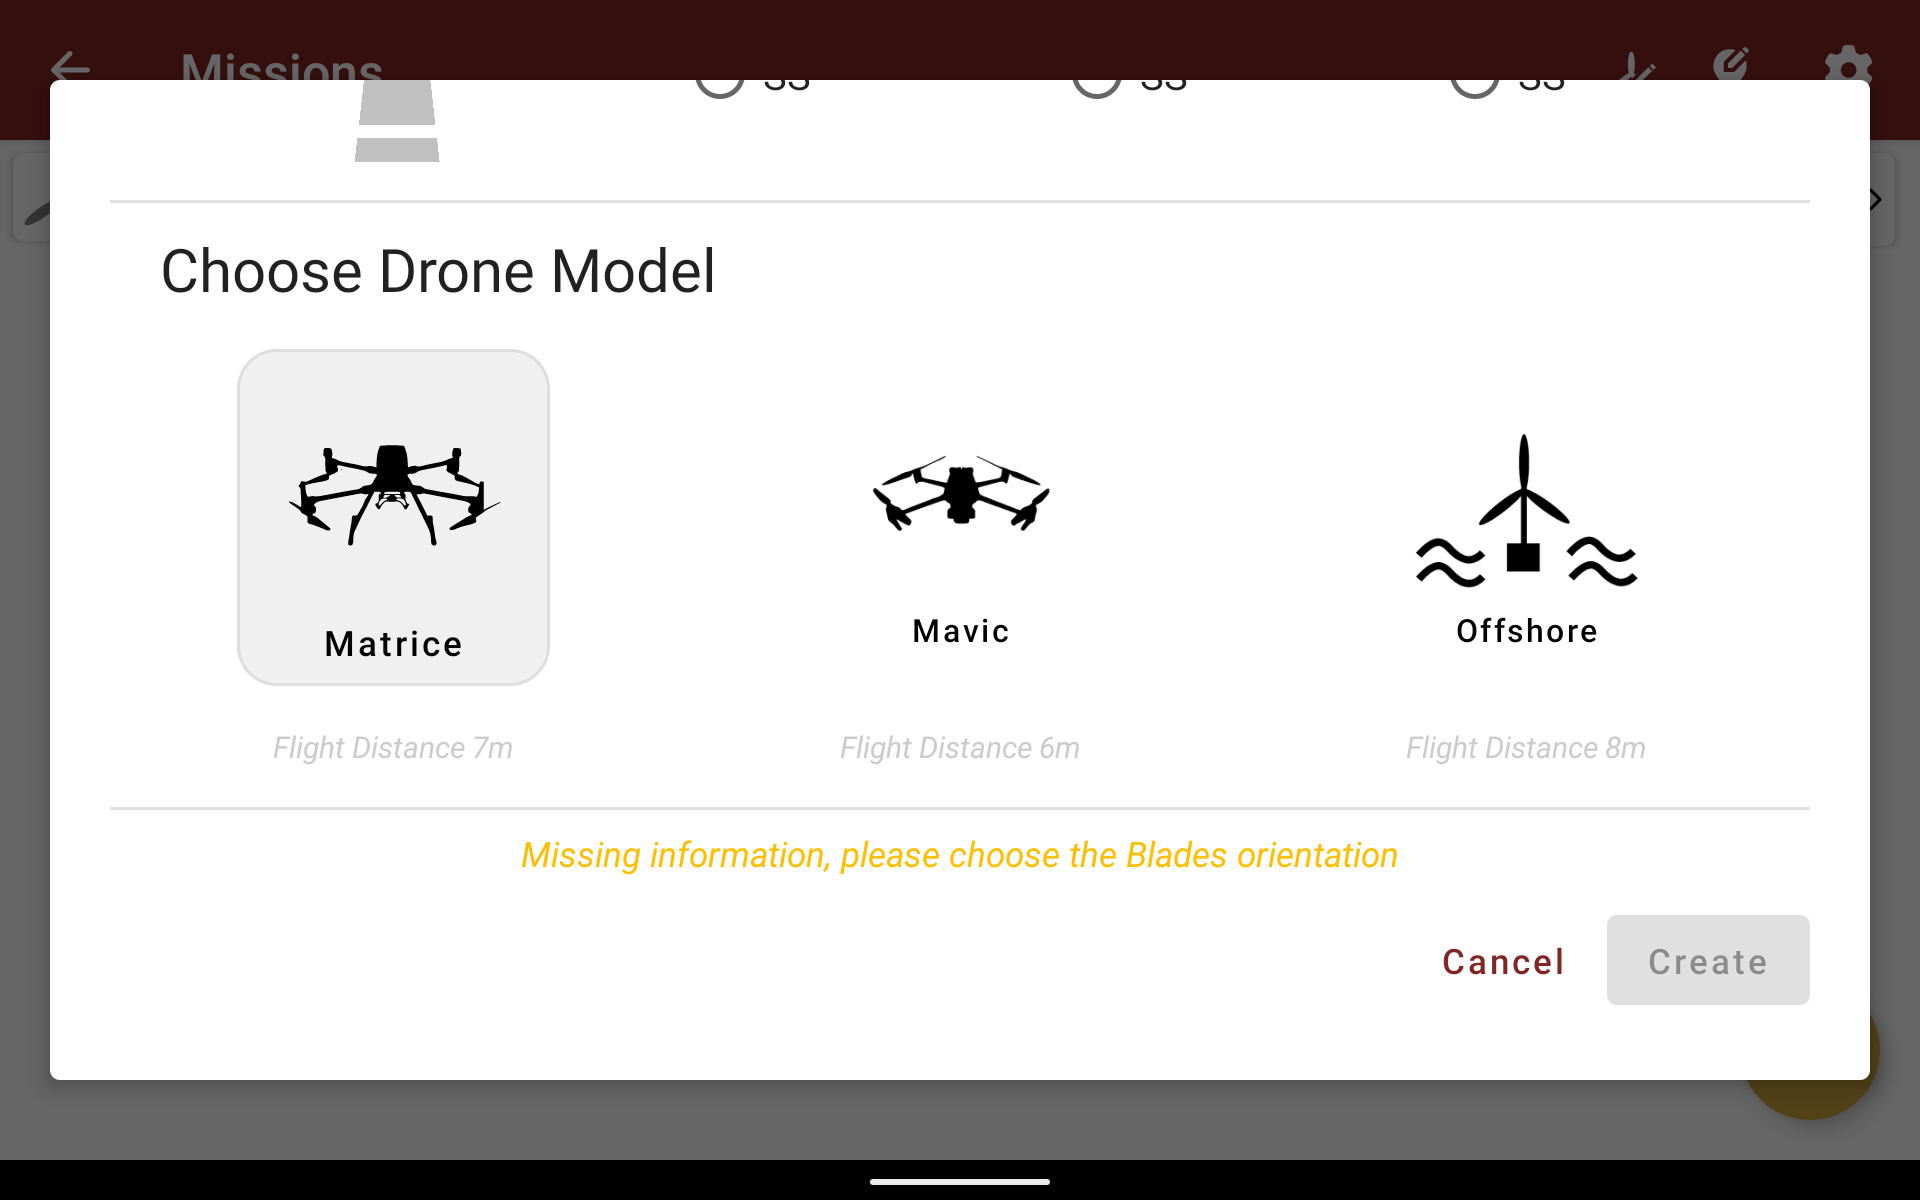
You then arrive on the Missions page. You need to create your mission and select the orientation of the blades of the turbine. This is the first thing you need to do when you arrive on the turbine : stop it in position, then identify which blade is up, which one is on the left, which one is on the right. After that, you will choose the inspection type and the drone that you will use. The type of the drone will determine your flight distance.

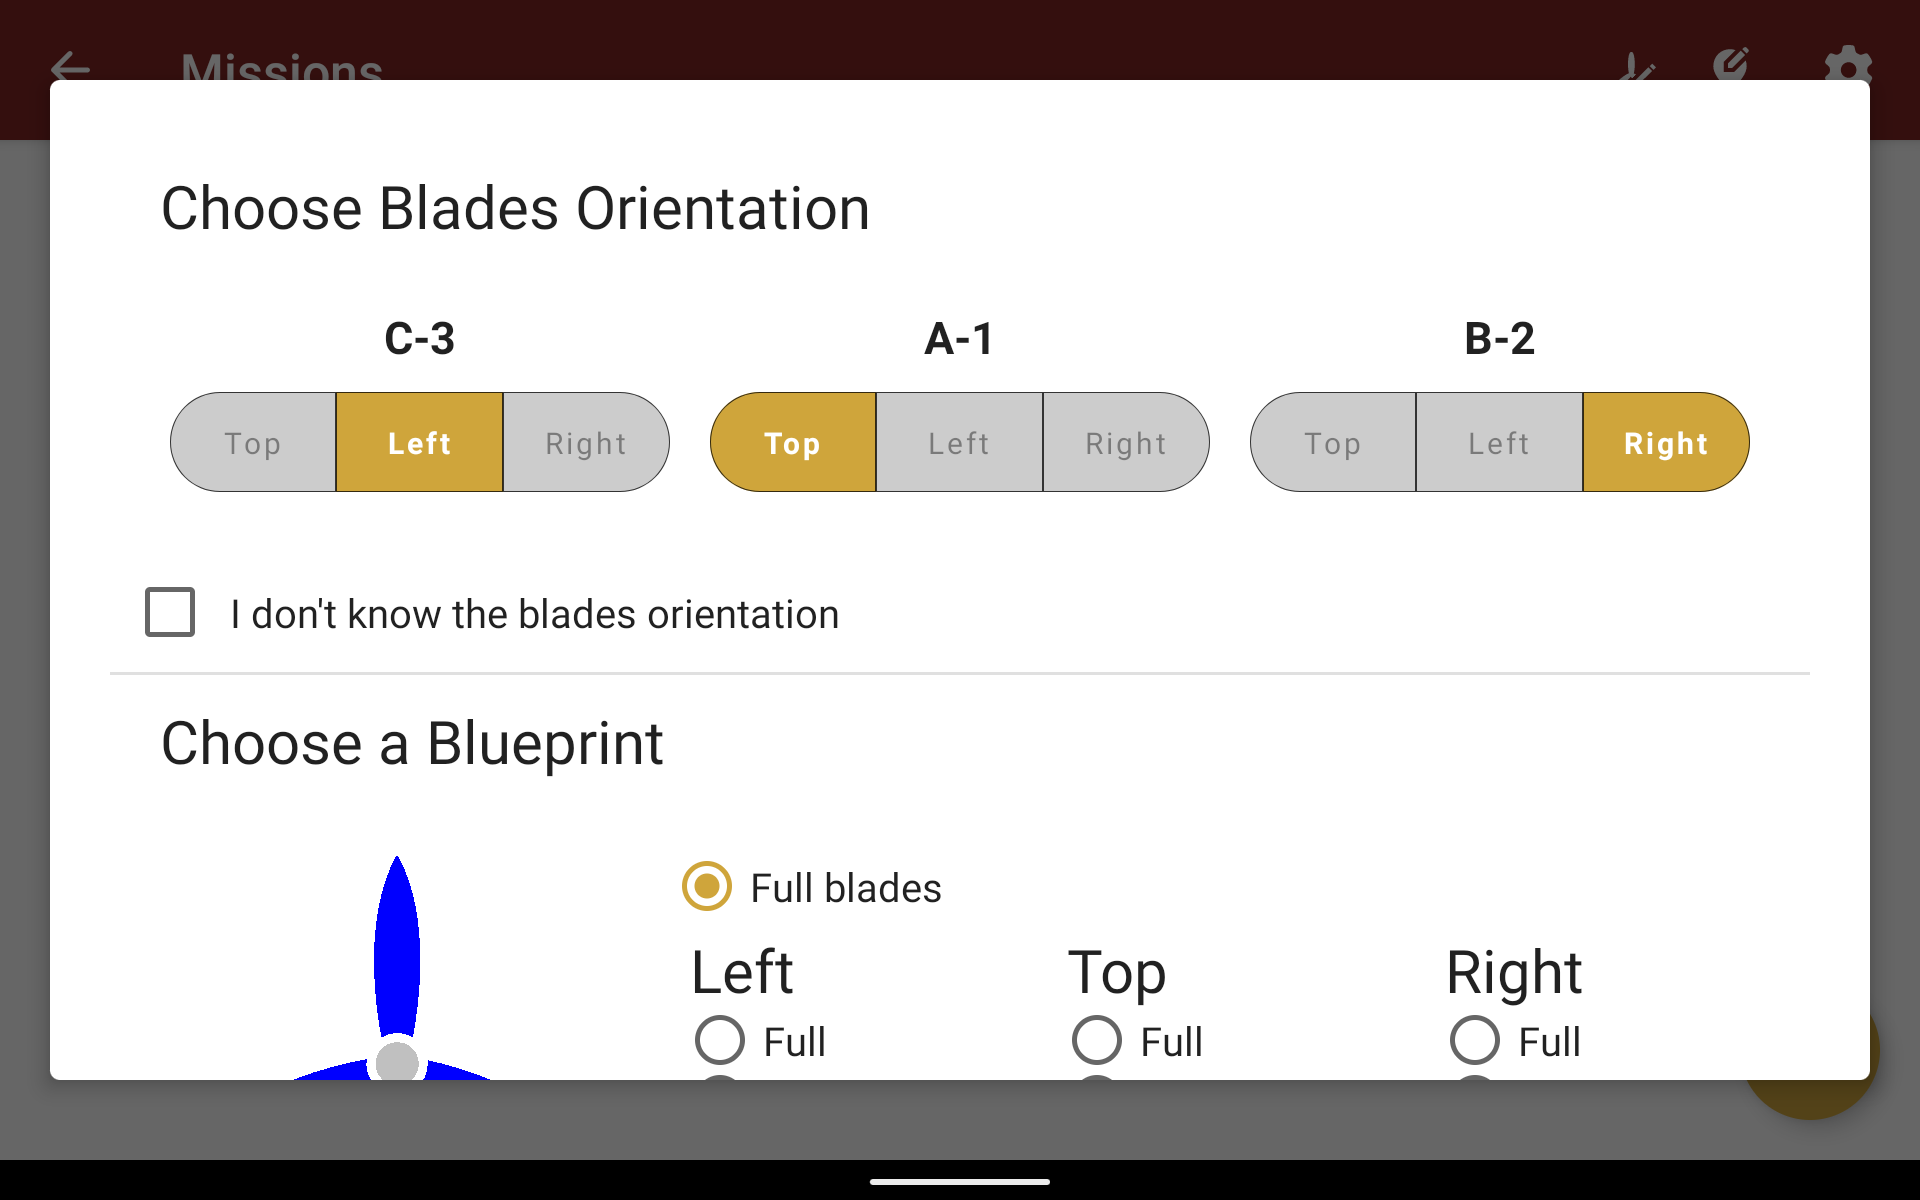
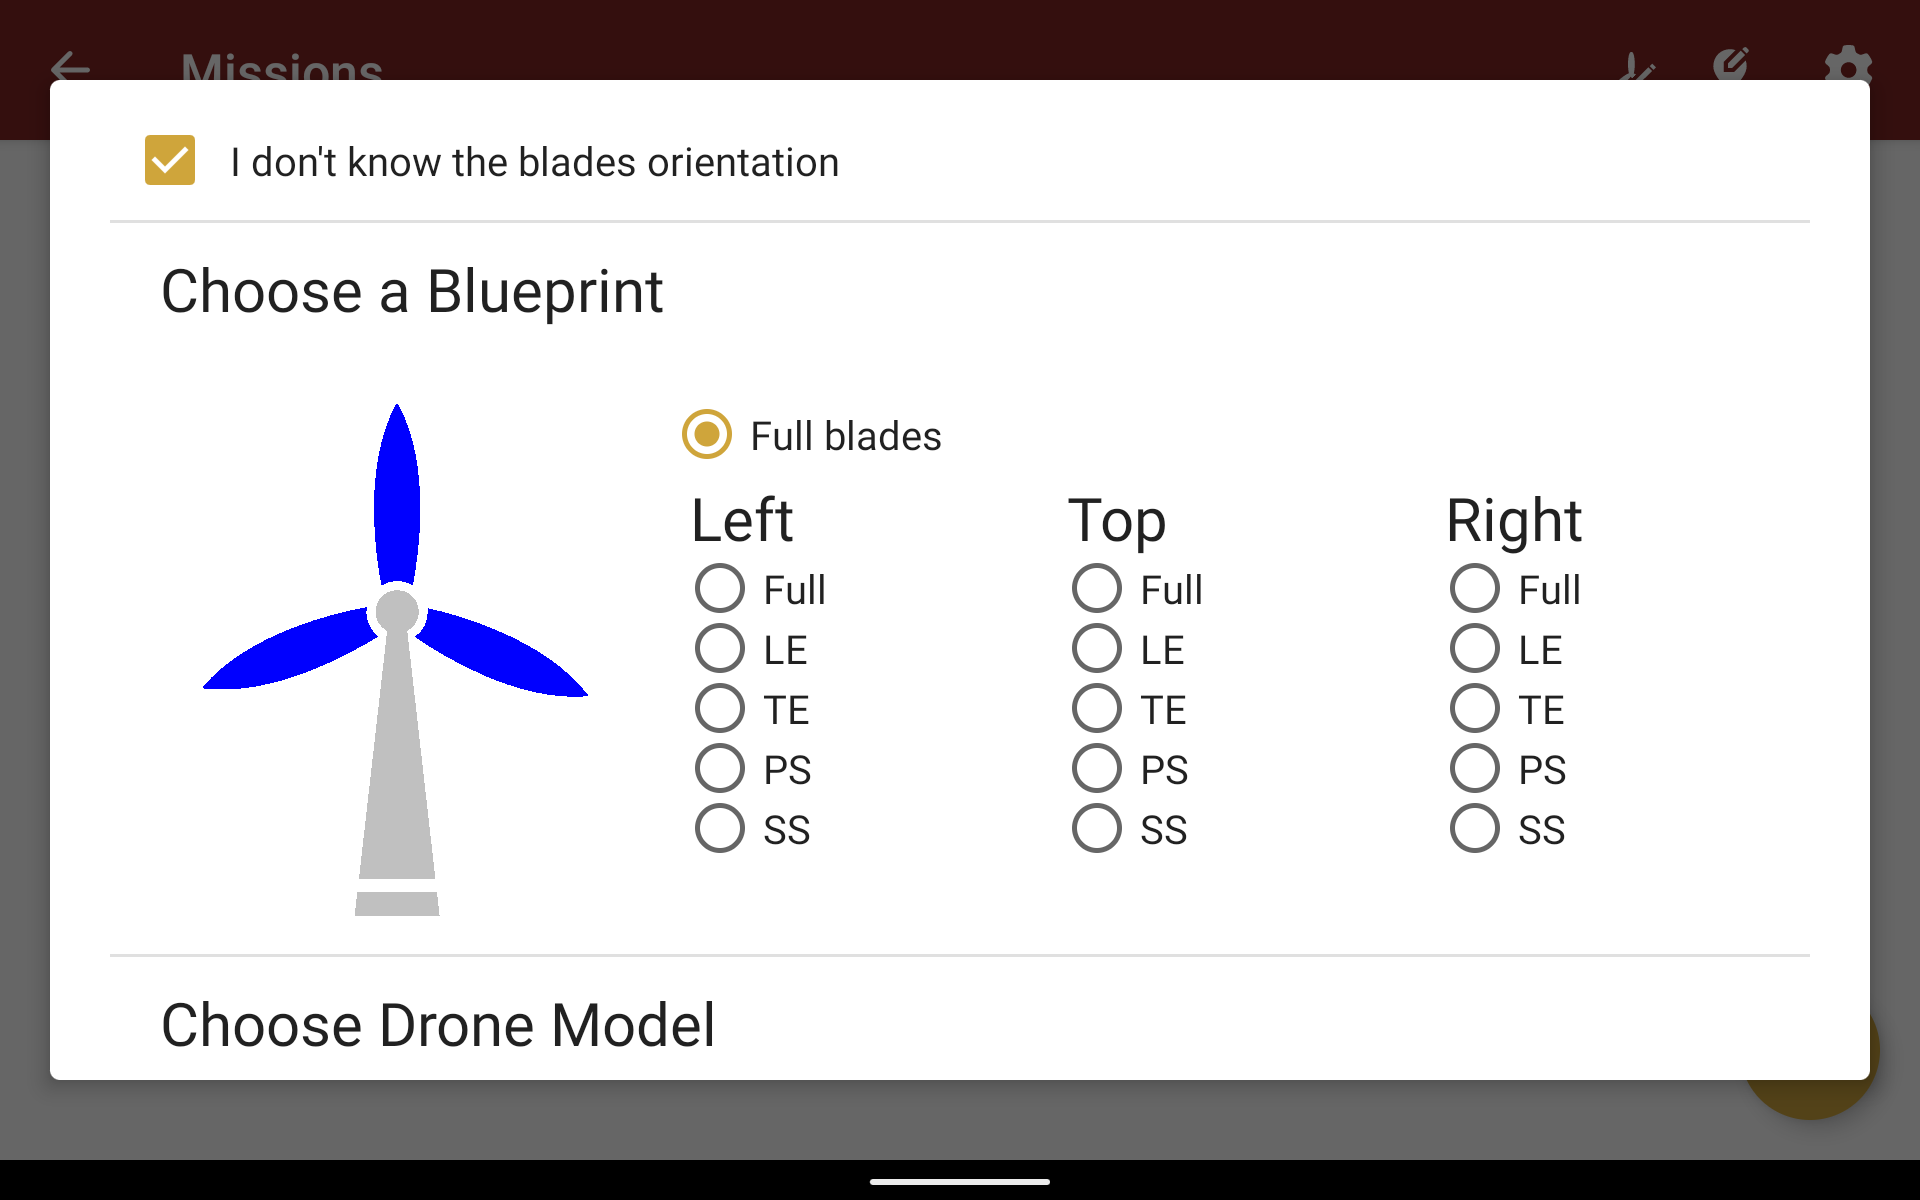
💡 In-Flight Orientation Editing
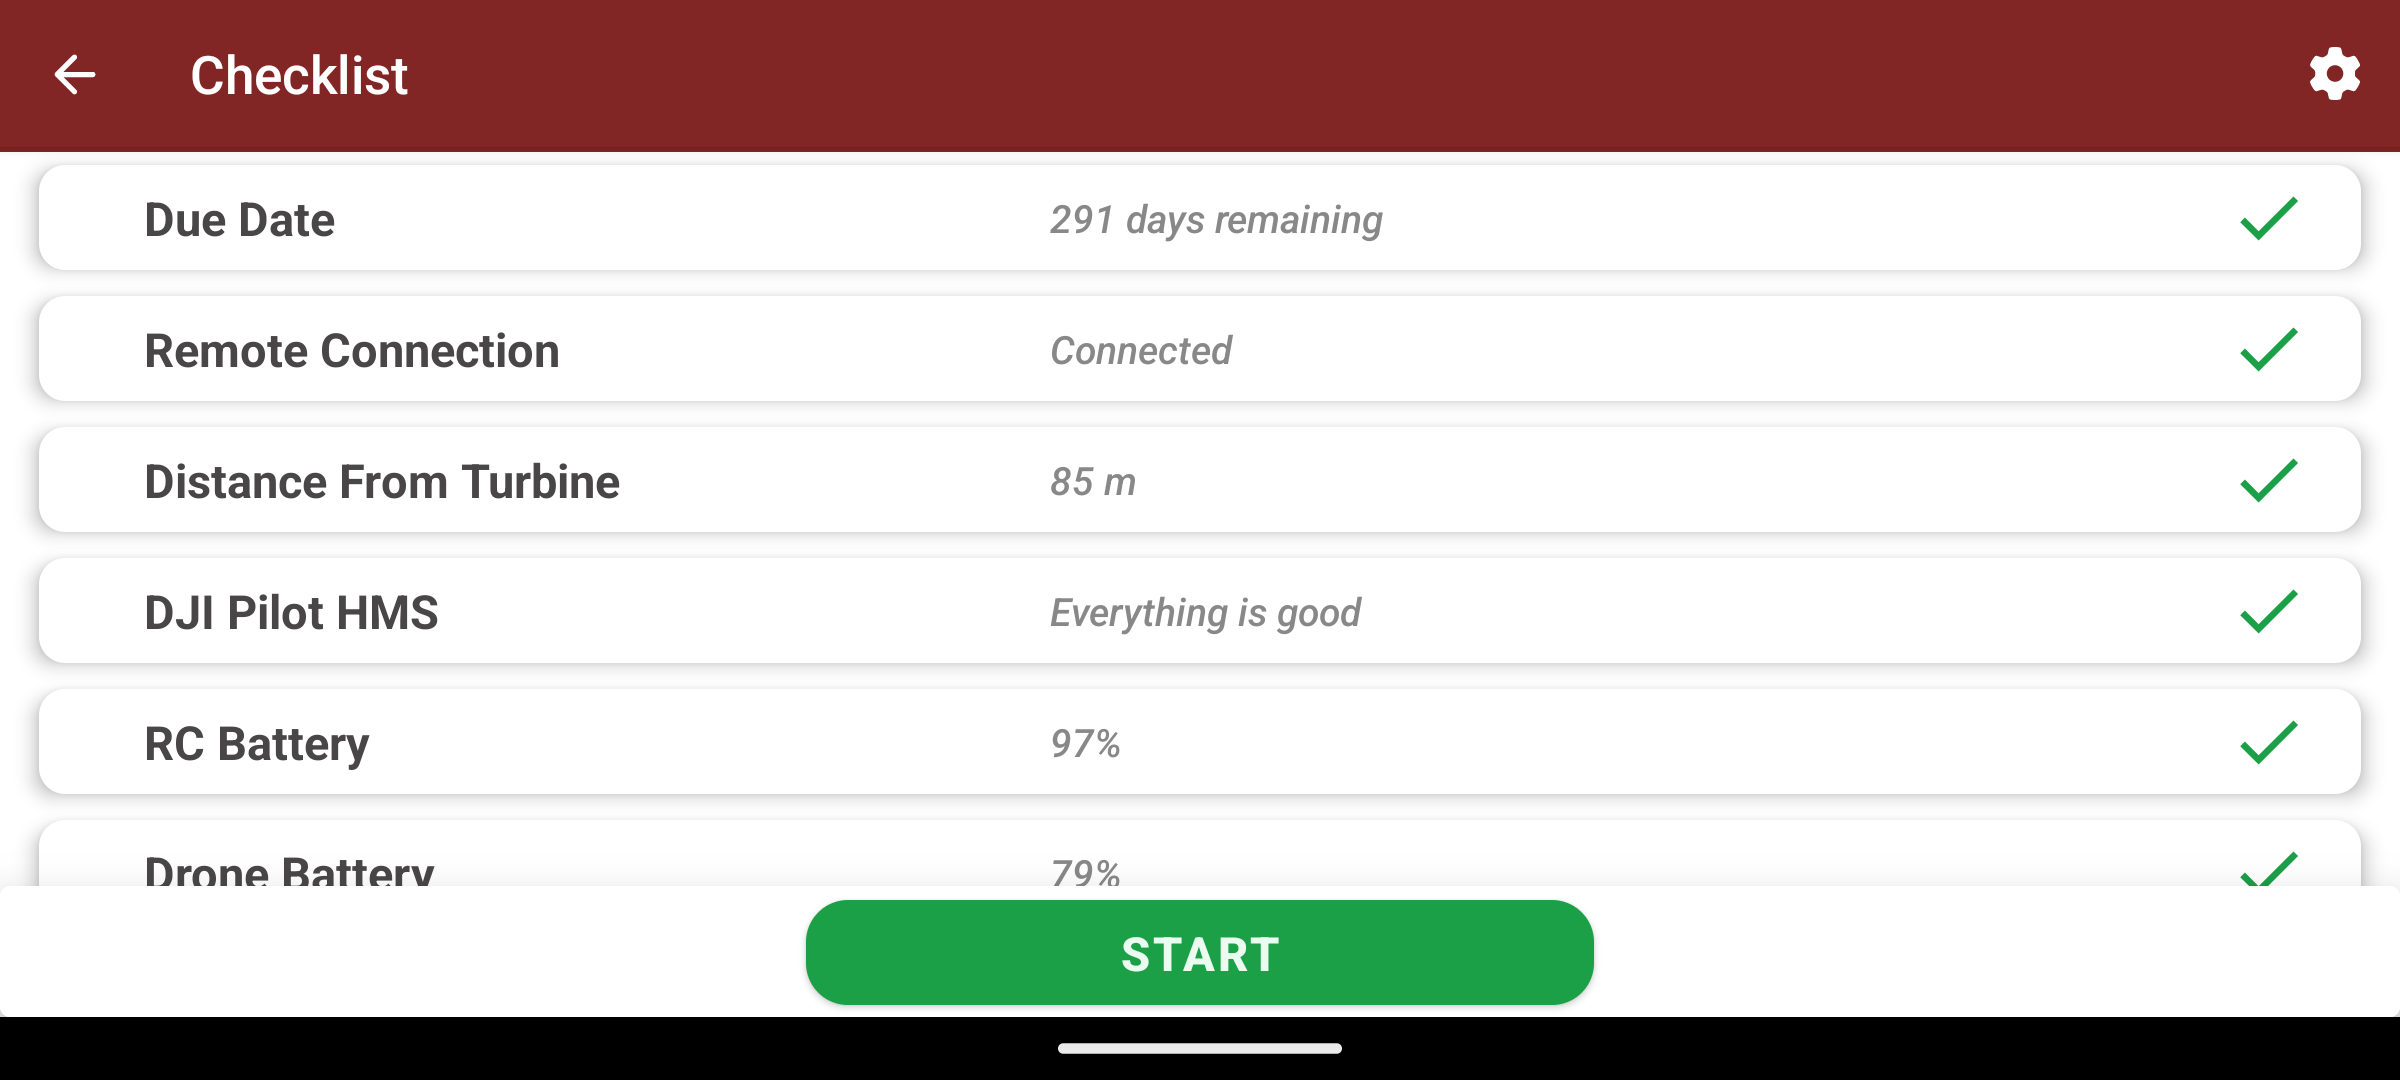
Checklist
The checklist makes sure that everything is ready before the flight, and will warn you if there is a problem that needs to be fixed, like a missing SD Card.
⚠️ Important
Inspection screen
There are two stages to perform the inspection : the manual calibration and the automatic flight.
Here is the calibration screen :
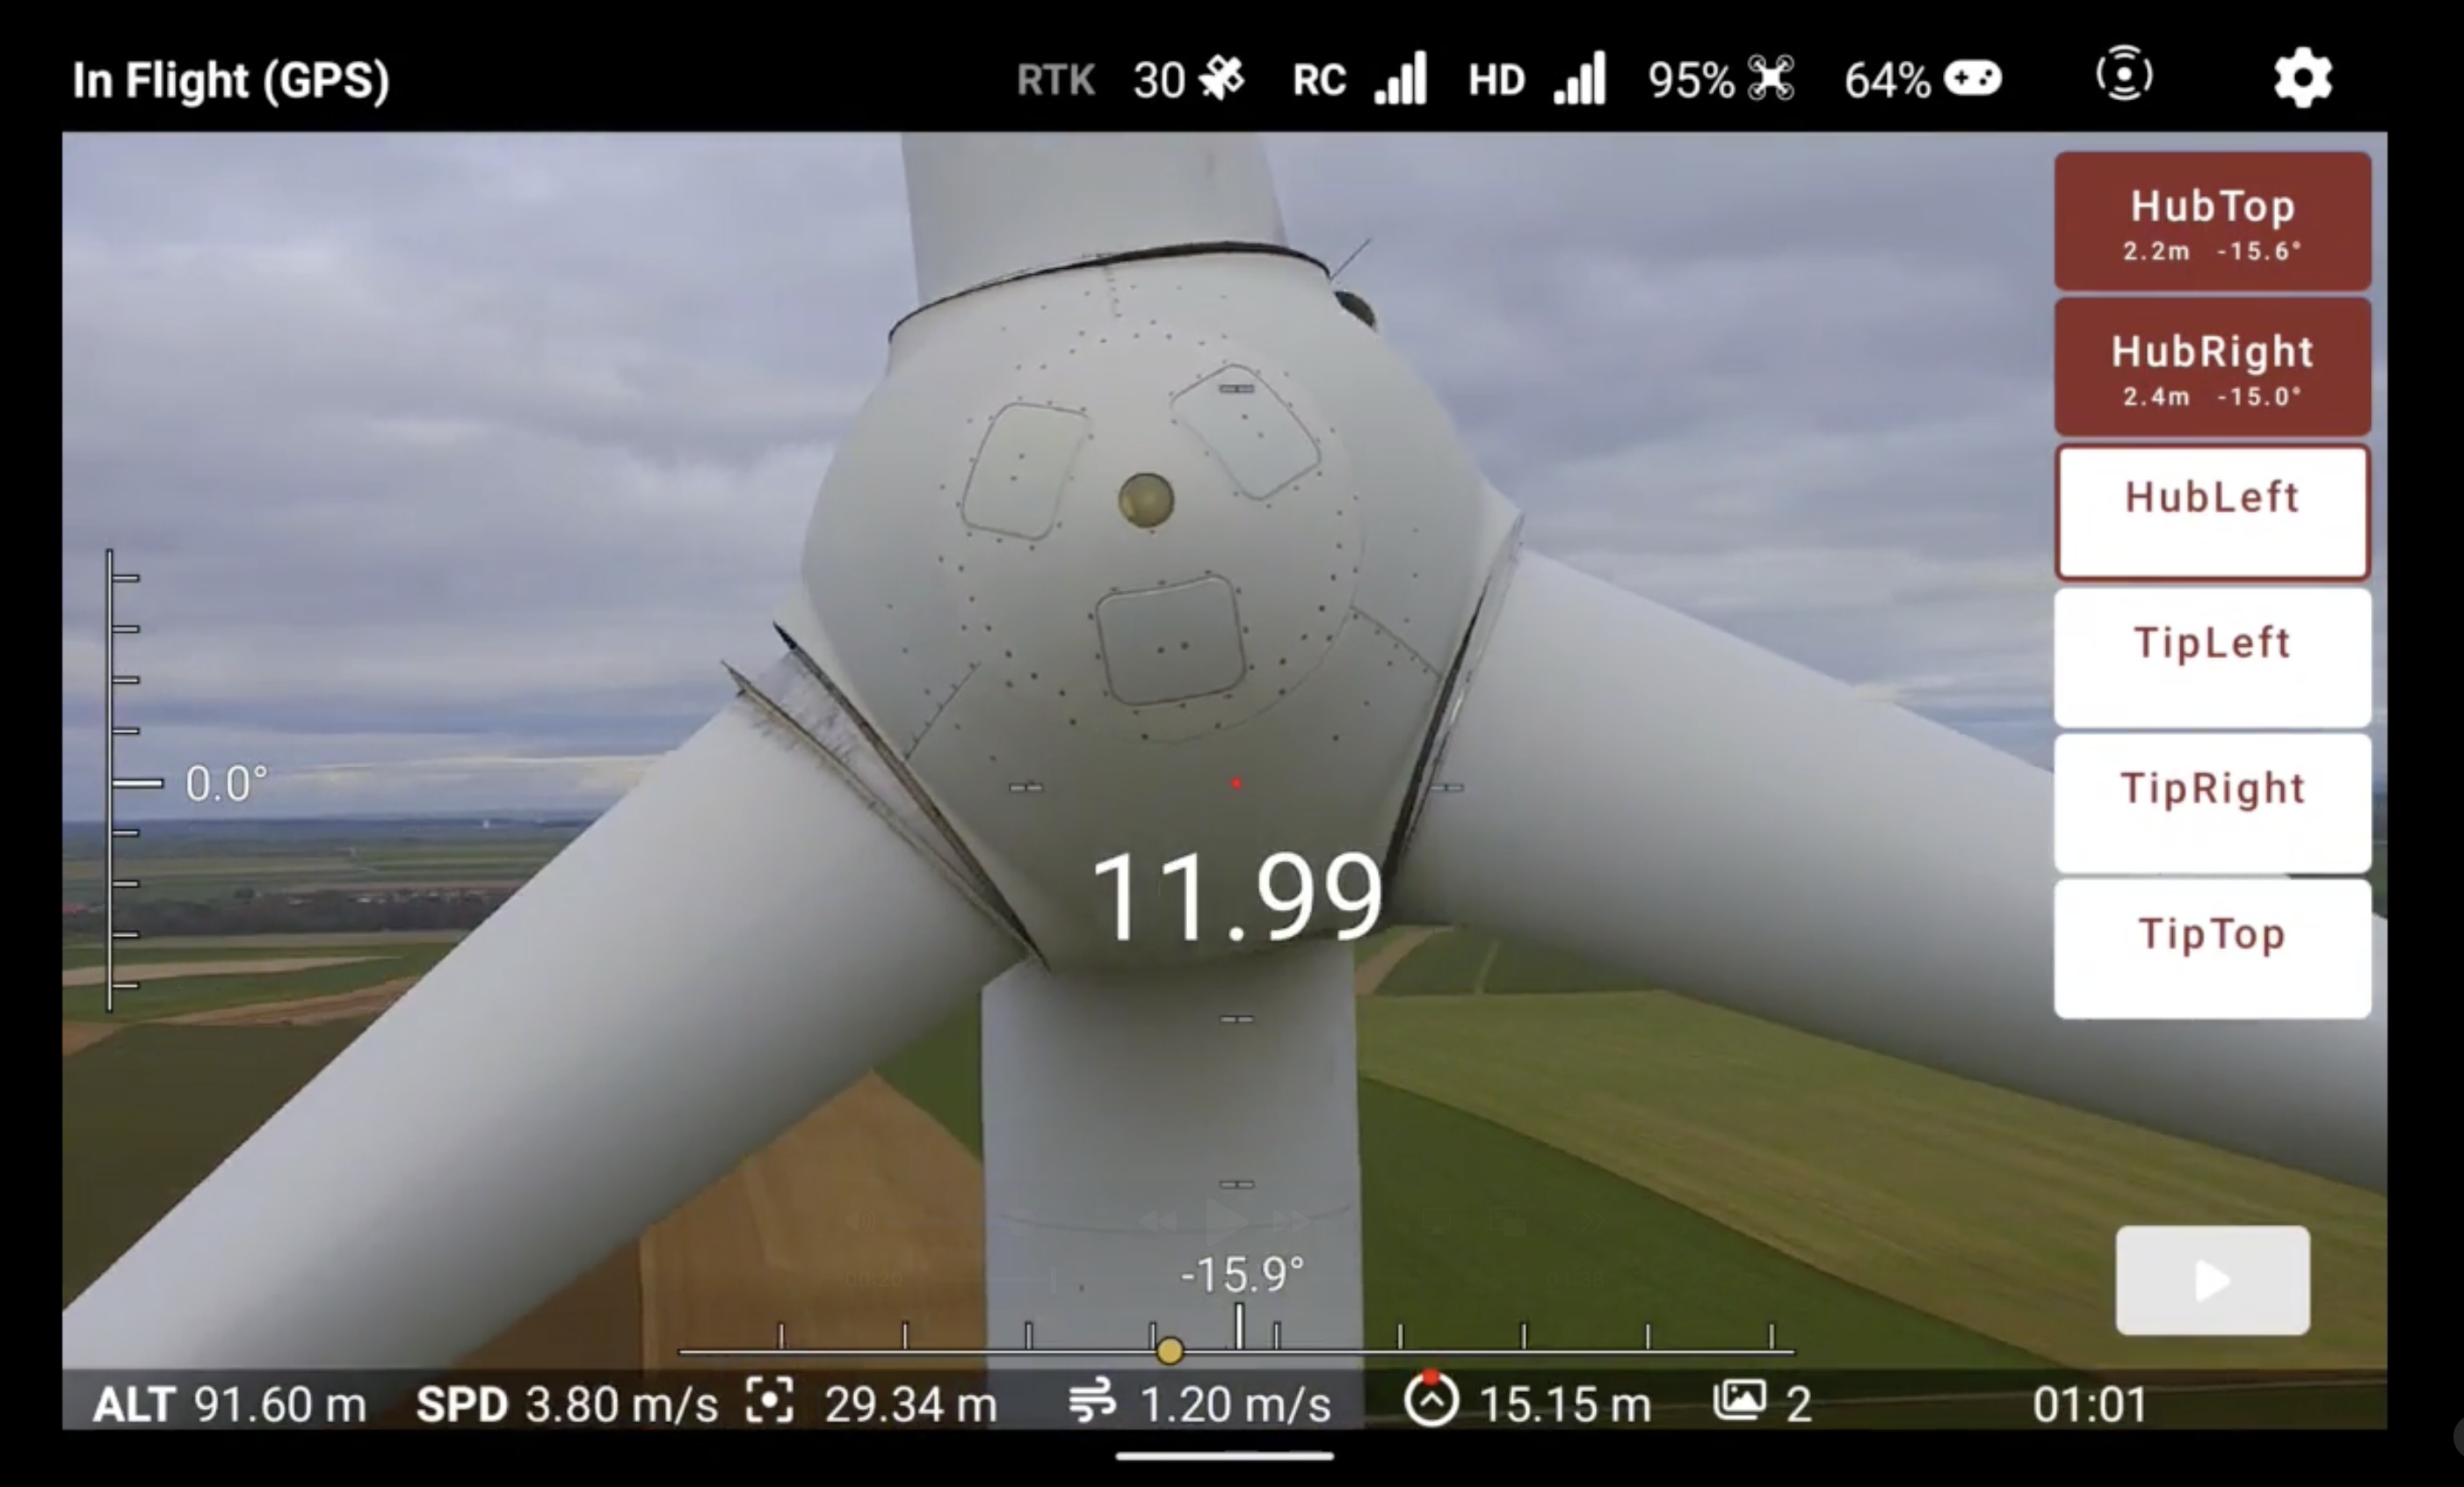 Simply click on the buttons on the right to validate a calibration point.
💡 Tip
And this is what the automatic flight screen looks like :
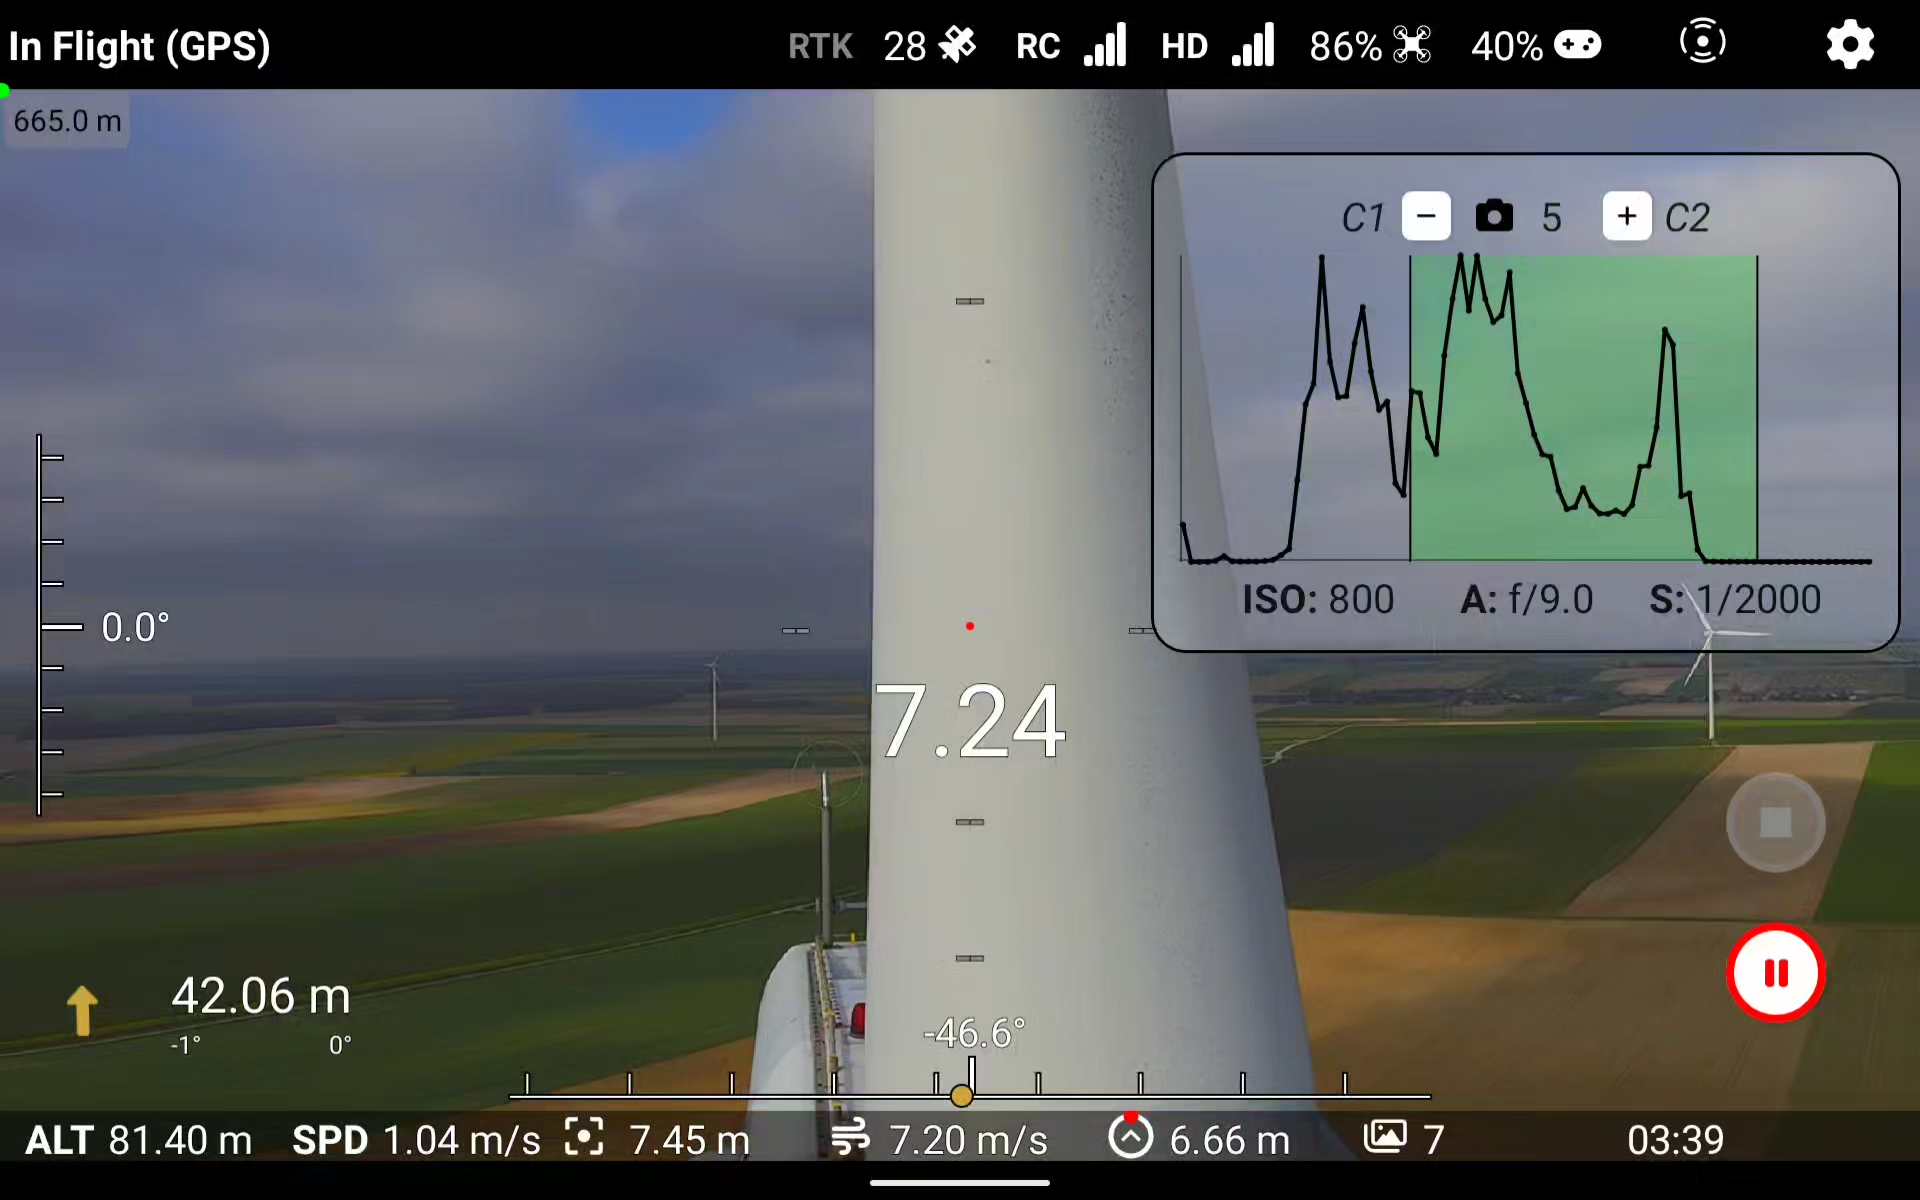 You will recognize the histogram of the image, as well as the pause button in red. The gray button is used to stop the mission, and can only be clicked when the drone is paused.
Quiz
Why must you verify blade orientation before starting a mission?
Single answer
Multiple answers
What is the purpose of the checklist screen?
Single answer
What are the two main phases of the inspection process?
Multiple answers
What information does the inspection status (checkmark or hourglass) provide?
Single answer
Why must you select the correct drone model before starting?
Single answer
What is the relationship between “inspection campaigns” and “turbines”?
Single answer
✅ Chapter Summary
Congratulations! You’ve completed the final chapter on the Cornis Drone App. Let’s recap:
🎯 Key Points to Remember
App workflow:
- Login (same credentials as web platform)
- Select inspection campaign
- Choose turbine
- Create mission (blade orientation + drone model)
- Complete checklist
- Perform inspection (calibration → automatic flight)
Main screens:
- Login: Authentication with pilot rights
- Campaigns: List and sync inspection campaigns
- Turbines: View status (✓ completed / ⏳ in progress)
- Missions: Create and configure flight mission
- Checklist: Pre-flight validation
- Calibration: Manual 6-point capture
- Autopilot: Automatic flight with monitoring
Synchronization button:
- Downloads latest campaigns
- Uploads completed inspections
- Use before field work AND after inspections
Mission setup steps:
- Identify blade orientation (top/left/right)
- Select inspection type
- Choose drone model (affects flight distance)
Inspection phases:
- Calibration screen: Capture 6 points
- Autopilot screen: Monitor histogram, use pause button, can stop mission when paused
Checklist importance:
- Verifies all requirements (SD card, battery, etc.)
- Warns about problems before flight
- Critical for flight safety
🎉 You’re ready!
You now have all the knowledge needed to:
- Understand photography principles for quality defect detection
- Execute the inspection procedure safely
- Make appropriate flight corrections
- Prepare missions properly
- Navigate the Cornis Drone App confidently